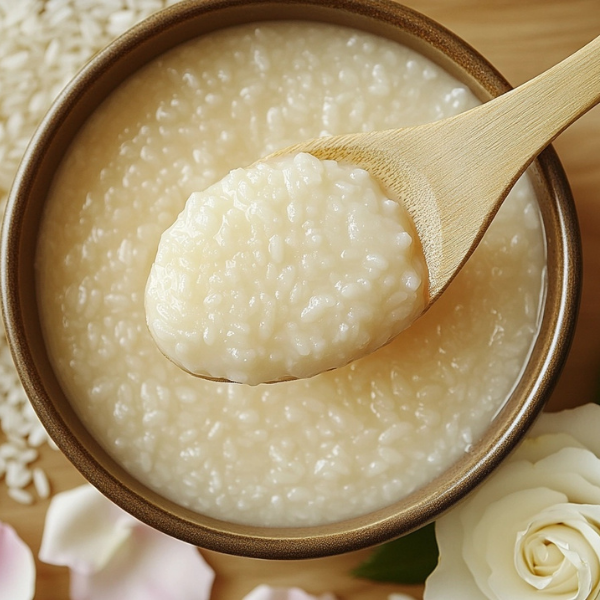
Rice has been a revered skincare ingredient for centuries—especially in Asian beauty rituals—for its ability to brighten, soothe, and rejuvenate the skin. This DIY rice face mask recipe is more than just a beauty trend; it’s a powerful natural alternative to Botox that uses simple kitchen staples to leave your skin glowing, firm, and youthful.
Benefits of This DIY Rice Face Mask
- Brightens Skin Tone: Rice helps fade dark spots and even out complexion.
- Firms and Tightens: The antioxidants in rice reduce fine lines and signs of aging.
- Soothes Redness and Irritation: Great for calming acne-prone or sunburned skin.
- Hydrates Deeply: Locks in moisture and boosts elasticity.
- Natural Exfoliation: Gently removes dead skin cells for smoother texture.
- Gentle on Sensitive Skin: Rose water option makes it suitable for reactive skin types.
Ingredients Overview
- 2 tablespoons rice – Brightens, firms, and calms irritation
- 1 tablespoon honey – Hydrates, soothes, and has antibacterial properties
- 1 tablespoon milk (or rose water) – Nourishes and brightens; rose water is gentler for sensitive skin
Instructions
- Boil the Rice
Cook 2 tablespoons of rice in water until soft. Strain it and save the rice water for later use. - Mash the Rice
Mash the cooked rice into a smooth paste using a spoon, fork, or blender. - Mix Ingredients
In a bowl, combine the rice paste with 1 tablespoon of honey and 1 tablespoon of milk or rose water. Stir until creamy. - Apply to Clean Skin
Spread the mask evenly over your face, avoiding the eye area. - Relax for 15–20 Minutes
Let the mask sit and do its magic. - Rinse with Rice Water
Gently rinse off using the saved rice water for an extra brightening boost.
How to Use It
- Frequency: 2–3 times per week
- Amount: 1–2 tablespoons per application
- Skin Types: Suitable for all, especially sensitive and mature skin
- Patch Test: Always do a patch test before applying a new mask to your entire face
Storage & Shelf Life
- Storage: Store unused paste in an airtight container in the fridge.
- Shelf Life: Best used fresh; can be stored for up to 3 days refrigerated.
Customization Tips
- For Oily Skin: Add a drop of lemon juice for oil control.
- For Dry Skin: Use full-fat milk or add a teaspoon of aloe vera gel.
- For Sensitive Skin: Always opt for rose water instead of milk.
Common Mistakes to Avoid
- Skipping the Patch Test: Always test first to avoid irritation.
- Using Hot Rice: Let the rice cool before applying to avoid burns.
- Overusing the Mask: Stick to 2–3 times weekly to avoid over-exfoliation.
- Not Saving the Rice Water: This step boosts the mask’s glow effect.
- Using Expired Ingredients: Fresh ingredients are key for skin safety and effectiveness.
FAQs
1. Can I use this mask every day?
No, 2–3 times a week is ideal to prevent irritation and over-exfoliation.
2. What type of rice is best?
White rice is commonly used, but brown or jasmine rice also work well.
3. Can I skip honey if I’m allergic?
Yes, substitute with aloe vera gel or plain yogurt.
4. Is this mask safe during pregnancy?
Yes, all-natural ingredients make it safe, but consult your doctor for any sensitivities.
5. Can I use rice flour instead?
Yes, mix rice flour with honey and milk to form a paste for similar benefits.
Conclusion
This DIY rice face mask is a gentle, effective, and affordable way to give your skin a radiant, youthful glow. With just a few natural ingredients, you can tap into centuries-old beauty wisdom and pamper your skin at home. Give it a try, and don’t forget to share your results, pin it for later, and tag your skincare bestie!
Would you like a Pinterest graphic or printable recipe card for this post?

