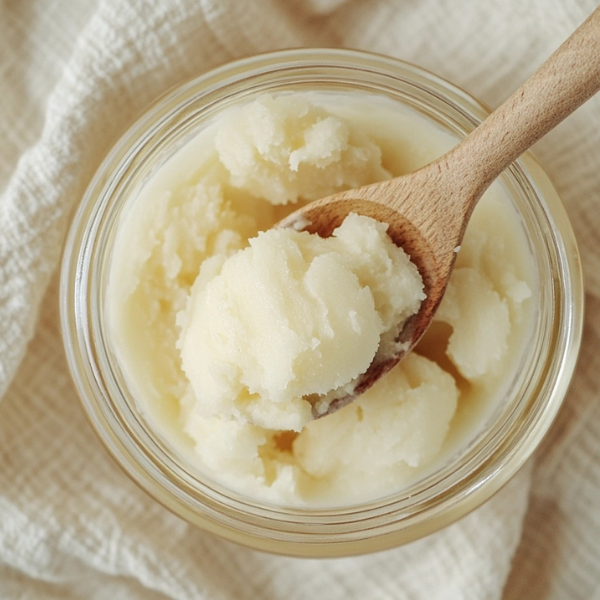
Learn how to make homemade Shea Butter Lumps to nourish and hydrate your skin naturally. Perfect for moisturizing and soothing dry skin.
Introduction
Shea butter is a natural skincare miracle, known for its deep moisturizing and healing properties. If you’re looking for a simple, effective way to incorporate this magic ingredient into your skincare routine, making Shea Butter Lumps at home is the perfect solution. These easy-to-make lumps are an ideal way to enjoy the full benefits of shea butter, whether you’re using them for dry skin, hair care, or simply for a soothing self-care experience. Ready to create your own batch of homemade Shea Butter Lumps? Let’s dive in!
Benefits of This DIY Product
- Deeply Moisturizes: Shea butter is packed with fatty acids and vitamins, making it a perfect moisturizer for dry skin.
- Soothes Irritation: Shea butter is well-known for its calming and anti-inflammatory properties, ideal for sensitive or irritated skin.
- Improves Skin Elasticity: Regular use of shea butter can promote smoother, more youthful-looking skin by boosting collagen production.
- Heals Dry, Cracked Skin: If your skin is prone to dryness or cracking, Shea Butter Lumps can help restore softness and moisture.
- Nourishes the Hair: You can even use these lumps to nourish and hydrate dry hair, making it shinier and more manageable.
Ingredients Overview
- Raw Shea Butter: The main ingredient, known for its ultra-hydrating properties and rich in essential fatty acids and vitamins A and E.
- Essential Oils (Optional): Add your favorite oils (like lavender or tea tree oil) to personalize the scent and add extra skincare benefits.
- Coconut Oil (Optional): Helps to soften the shea butter and make the lumps easier to apply.
- Beeswax (Optional): Used if you want the lumps to have a firmer texture.
Instructions
- Melt the Shea Butter: Start by gently melting raw shea butter using a double boiler or microwave. Place 1 cup of shea butter in a heatproof container and heat it until it becomes liquid (don’t overheat it to avoid losing its nutrients).
- Add Optional Ingredients: Once the shea butter has melted, stir in any additional ingredients. Add 1 tbsp of coconut oil if you want a smoother consistency, or a few drops of essential oils for a custom scent and extra skincare benefits. If you want firmer lumps, add 1 tsp of beeswax and stir until fully melted.
- Cool and Set: Pour the melted mixture into a silicone mold or onto a parchment-lined tray, forming small lumps. Let the mixture cool to room temperature, then place it in the refrigerator for about 30-60 minutes to harden.
- Unmold the Lumps: Once set, remove the lumps from the mold or break them into pieces if you used a tray. Store them in an airtight container.
How to Use It
- Frequency: Apply Shea Butter Lumps to your skin and hair daily or as needed.
- Amount: A small amount goes a long way. Simply rub a lump between your hands to soften it, then apply to dry areas.
- Skin Type: Shea butter is suitable for all skin types, especially dry and sensitive skin.
- Patch Test Tips: Always do a patch test before using shea butter on your skin, especially if you have sensitive skin or allergies.
Storage & Shelf Life
- Storage: Keep your Shea Butter Lumps in an airtight container in a cool, dry place to prevent them from melting. If you live in a warm climate, you may want to store them in the fridge to keep them firm.
- Shelf Life: When stored properly, these lumps should last for up to 6 months. Be sure to check them for any changes in texture or smell before use.
Customization Tips
- For Dry Skin: Add a tablespoon of coconut oil for an extra boost of hydration.
- For Sensitive Skin: Choose mild, soothing essential oils like chamomile or lavender, which are gentle on sensitive skin.
- For Anti-Aging: Add a few drops of rosehip oil, which is known for its anti-aging properties and helps reduce the appearance of fine lines.
Common Mistakes to Avoid
- Overheating the Shea Butter: Avoid using high heat, as it can degrade the quality of the shea butter and reduce its effectiveness.
- Using Too Much Essential Oil: Essential oils are potent—too much can irritate the skin. Stick to a few drops to avoid reactions.
- Not Allowing Proper Cooling: Be patient when cooling the lumps—if you move them too soon, they might not set correctly.
- Storing in Warm Areas: Keep the lumps away from heat or direct sunlight, as this can cause them to melt and lose their texture.
FAQs
- Can I use Shea Butter Lumps on my hair?
- Yes! Shea butter is excellent for hair care. Simply melt the lump between your hands and apply it to the ends of your hair for added moisture and shine.
- How long do the Shea Butter Lumps last?
- If stored in a cool, dry place, these lumps can last up to 6 months. Always check for any changes before using.
- Can I use Shea Butter Lumps for my face?
- Absolutely! Shea butter is perfect for dry and sensitive skin, including the face. Just be mindful of the amount you use, as it’s quite rich.
- Do I need beeswax to make the lumps?
- No, beeswax is optional. It’s only used if you want the lumps to be firmer. Without it, the lumps will still work but might be softer.
- Can I make these lumps without coconut oil?
- Yes, you can! Coconut oil is optional. It helps soften the texture, but you can make Shea Butter Lumps with just shea butter and essential oils if you prefer.
Conclusion
Making your own Shea Butter Lumps at home is a simple and effective way to treat your skin to the nourishing properties of pure shea butter. Whether you use them on your body or hair, these lumps are an easy, DIY way to enjoy the many benefits of this natural moisturizer. So, why not give it a try and pamper yourself with these luxurious homemade treats? Don’t forget to share this recipe with your friends, pin it for later, and tag us when you create your own Shea Butter Lumps!

